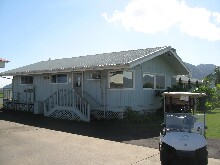
Pua Kea Golf Course Detail
This writeup was done from the blue tees (6471 yards). The whites tees are around 6071 yards, and the greens stretch all the way out to 6954. The back tees have some longer forced carries, and some more challenging angles over water.
The opening hole is a wide open straightaway par 4. You really can't get in trouble off the tee, so pull out your driver and give it a whack. Trouble comes into play on the second shot, in the form of a creek that runs diagonally across the fairway in front of the green. It's not an issue if you hit a clean tee shot. If not, well, you might want to consider laying up.
#2 is a wide-open par 5 (530 yards). There are some bunkers on the left that you can potentially reach from the tee. But it's not like this is a tight fairway. Go ahead and use your driver, and hit down the middle. An off-center hit will take some distance off the ball anyway... If possible hit your second shot to the right half of the fairway. The green tucks in to the left behind a bunker complex, and the angle from the right is a more favorable approach.
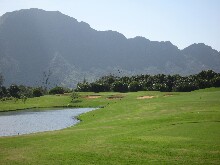
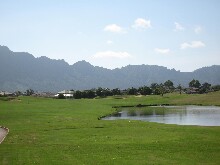
#3 gives you a really pretty look at the nearby mountain range off the tee. The pond is basically out of reach, but you still want to favor the right hand side of the fairway, unless you like hitting your approach shot over the water...
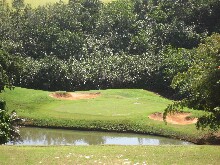
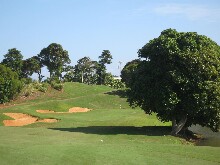
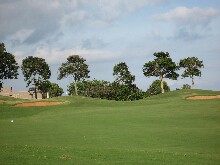
#4 is a short par 3 protected in front by a formidable bunker system. The best defense is a good offense. Aim at the pin and hit a quality shot, and the bunkers won't come into play.
#5 is a short par 4 (342 yards). Take advantage of the shortness, and don't go at the green off the tee! Hit it out to the right at the 150 marker, and come in from the right with a short iron. Otherwise you're likely to a) catch the edge of the water, or b) get tangled up in all those bunkers up around the green. Who needs that?
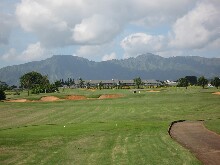
#6 is basically one of your jaw-dropping-scenery holes. It's a respectable par 3 (176 yards) off a steeply elevated tee. The green seems far, far below you from the teebox, and there is trouble everywhere (sand, water, jungle...) Short is no good, but neither is long. You just need to man up and hit a decent shot. Because of the drop in elevation, plan on carrying one club less than normal (unless there's wind, of course).
#7 is a mental hole. From the tee box it looks a mile long, with nothing but trouble in the way. Take a deep breath and look at the score card -- it's only 364 yards! But the junk??? It's not that bad. You hit your drive farther than that on every hole, every day. And the sugar cane field on the right? Don't hit it there! Look at the fairway -- there is plenty of room out there! They've put a target in the middle of the fairway (the 150 yard stake) to help you out. Use it.
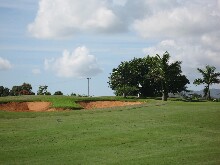
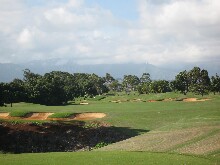
The tee box on #8 is a pretty good drive from the seventh green, and winds back through some nice houses. Once you finally get to the tee box, you'll see that the hole doglegs to the right around a non-stop barrage of bunkers. I mean, it's ridiculous how many bunkers are on the right on this hole. This is short (489 yards) for a par five, so do the obvious thing -- hit the ball to the left side of the fairway on your tee shot. Keep it left on your second shot, and you'll still be hitting short iron into the green. There's really no need to get greedy here. Just stay out of the bunkers.
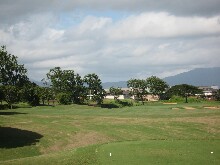
The ninth hole is a longish par 4 at 410 yards. It has a really wide-open look off the tee. There is a bunker complex on the left which you want to avoid. It's okay to add some length to the hole by staying out to the right. You don't want to be in a bunker with a lip when you're still 200 yards out. As you approach the green, there are formidable bunkers left and right, but the green is huge, and it's pretty easy to get on the green without getting tangled up in the bunkers.
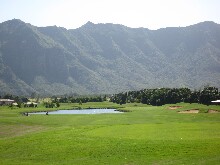
The 10th hole is another pretty good drive from the 9th green. Once you get there, you'll see that the tee shot lines up on a pond to the right of the fairway. The pond is absolutely in play on both your tee shot, and your second shot. So pay attention and hit a straight, high-quality shot to the left side of the fairway. Use your three wood or a long iron if you have to.
#11 is a 528 yard par 5. You're probably not going to reach this in two (massive bunkers fronting the green), but you definitely want to be playing from the fairway. Hit whatever club off the tee will maximize your chances of hitting the fairway. Chances are that you'll be going uphill a bit on your third shot, so consider taking an extra club just to keep those bunkers out of play.
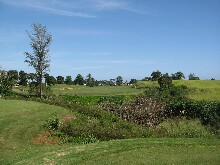
#12 is a very challenging hole. It's only 356 yards, but there's a lot going on. First of all, there's a split fairway. Second, there's a pond on the right, and thirdly, there are a couple of huge trees next to that pond. So you can tell from the get-go that you want to hit it left, because the further right you go, the less of a shot you have to the green because of those huge trees. Obviously, knowing that you should hit left, and then being able to actually do it are two different things...
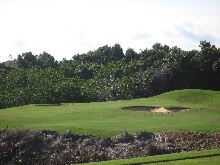
#13 is another "scenery par 3". This one plays a whopping 200 yards. Plus it's kind of narrow. Plus there's a pond on the right. Plus there are bunkers left and right. Well, the bunkers are certainly preferable to the pond, so bail out left if you have to (but then you'll be chipping back toward the pond...).
#14 is a 369 yard par 4. There's a trap on the right you want to avoid (although if you hit it well, you might be able to fly over it anyway. The green is protecteed in front by one of those swales made famous by the "valley of sin" at St. Andrews (do you fly it? or run it on?) There's a pretty good bunker system on the left, so don't miss it there!
#15 is all trouble, all the time. It's a long par 4 (403 yards) with a forced carry on the tee shot, a small forest on the left, and a sea of bunkers out in front. Yes, those bunkers are reachable. In retrospect, I've come to realize that discretion is the better part of valor, and that the best way to approach this hole is with a "bogey is a good score" attitude. Lay up off the tee (but hit it straight down the middle), lay up on your second shot (but hit it straight down the middle), chip on, and two putt (or maybe even save par with a one-putt). Instead, I hit driver and pulled it into the left rough where I had a bad lie and no angle to the green. This resulted in hitting my second shot into one of those bunkers. I bladed my first bunker shot into the jungle (lost ball), but managed to flop my second bunker shot onto the green from whence I two-putted. 7. Yuck.
#16 is a short par 3 (120 yards). Take dead aim. (I made a birdie which took some of the sting out of that triple I picked up on #15...)
#17 is a 420 yard par 4 that doglegs left around a bunker. For my game (all fades, all the time), this is the most difficult style of hole there is. However, this is another one of those "bogey is a good score" holes. Keep the ball in play, and see what happens.
The round finishes with a 495 yard par 5. This one again wraps around bunkers on the right. Stay out of those bunkers, and life is a bowl of cherries. Because of the relatively short length, you don't have to really stretch yourself hitting drivers and long irons. A three wood, and a couple of mid-irons will probably do the trick!
This is a fun course. There is great scenery, plenty of holes to challenge your thought processes, and plenty of rewards for hitting good shots. If they would move this course several thousand miles closer to home, I would play it often!
|