Makanai Golf Club Detail
This writeup is from the white tees.
Hole #1 Short par 4 with a sharp dogleg left. There's a big tree at the dogleg, and plenty of room left and short of the tree. I hit my tee shot a little long, but didn't quite run out of fairway, and that was under the tree enough to be an easy wedge shot in.
The second hole is a short par 5, with kind of a blind tee shot. Aim at the bushy evergreen on the right side of the fairway. Since the fairway feeds left, that will set up an easy midiron layup.
#3 is a short par 4. The fairway is in the middle of a little valley, meaning a wide shot will feed back toward the middle (unless you hit it out of the valley altogether). Having said that, there's no need to get greedy. Hit a controlled straight shot up the middle, and this hole can be had.
#4 is also in a valley, but this one is uphill, and the valley is a bit wider. Something you might not realize off the tee, and maybe not even on your second shot, but there's OB just right of the green, and they appear to be redesigning some berms up there too, so pay close attention to your approach shot.
The fifth hole is a long par 3 with a creek running diagonally across the fairway. The miss is right, so don't go hitting any snap hooks here.
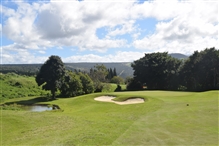
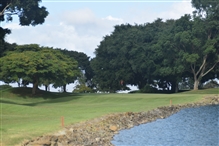
#6 is an interesting hole. Aim left of the tall tree by the right bunker. On your approach shot, there's a long bunker wrapping the green right and long just inside the water, so there's a little forgiveness there, but don't push it!
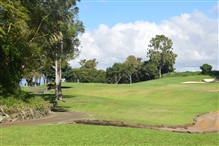
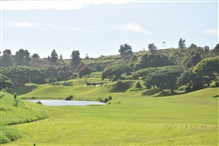
The seventh hole is a classic risk/reward hole. It absolutely forces you to man up and hit a good tee shot. With the length (396 from the whites) and the pond running all the way down the right side of the water, you a) have to hit it hard, b) with no fade if you want to have any chance of getting on in regulation. Of the two, obviously b) (no fade) is the most important. Bogey is not a bad score here. Par is a great sscore!
#8 is a par 3, and the tee shot is mostly over a pond. Assume that whatever distance you're playing from is all carry (and remember, you'll get no roll if you actually hit the green).
The ninth hole is a longish par 4, which wraps around a pond to the right. So, if you're inclined to hit fades, stay well left of the 150 yard marker -- there's no room to the right. (Even if you're short, and land in the waste area, you could still roll into the creek). Odds are good you're doing to have a long approach shot into this green. Stay left, away from the water.
#10 is another hole that doglegs right to wrap around a pond. From the white tee, it's only about 230 yards to get through the fairway to reach a bunker on the left side, so plan accordingly. Position is more important than distance here (and staying dry is important too!).
#11 is another dogleg right. At 380 yards, it's moderately long. A really good drive (go right at the center pole) can leave you a mid or short iron into the green. The approach shot is a little bit blind, and you might have to stand on your tiptoes to see the flag (I'm 6'4", so maybe you should drive your cart forward until you can see the flag so you know what you're aiming at).
#12 is an intimidating par 5. It looks kind of narrow because of the lake that runs all the way down the left side of the fairway. While there's a little bit of room to the right, there's also a lot of junk on the hill over there. Frankly you need straight worse than you need distance, so a three wood or a hybrid off the tee might be more appropriate than your driver. Ditto with the second shot -- you really have to hit it straight. This hole is handicapped at #16, but for my money, bogey is a decent score!
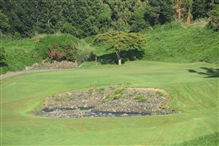
#13 is a par 3 with OB left and long. Stay calm and hit a solid shot to the middle of the green.
#14 looks like it's about 200 yards wide, but it's not. There's a huge bunker in the left rough that you really don't want to mess with. Hit the ball at the 150 marker. Don't get too far right up the bank because that makes the hole play even longer coming up the hill. Take at least one extra club, and maybe two!
#15 is a really short par 4 with a huge pond fronting the green that's fairly difficult to miss. Unless you hit something short of it. The only reason my three wood came up short was because I popped it up high in the air. The other option is to hit left of the bunker, but it's a little bit narrow there. The green is very narrow, with a collection area behind it.
#16 is a par 5 with a tree in the fairway obstructing your tee shot. I hit my tee shot in the left rough to miss the tree. It might have been better to hit it in the right rough, because there's a bank there which might have fed it back to the fairway. The gotcha on this hole is a hidden bunker lurking over a hill to catch your second shot. Because the green is tucked in to the left, there's a tendency to cut the corner a bit on your second shot, and that's where the bunker comes in... Make sure you get back to the middle of the fairway on your second shot to set up an easy approach to the green.
#17 is billed as the only island hole on Hawaii. I'm not sure I believe it, but there it is. Anyway, whichever tee you're playing from, go for the middle of the green. Remember, you'll get no rollout once it lands, so make sure you've got plenty of carry. The mistake I made was that I went for the pin, which was all the way back. I absolutely pured my tee shot, and it went 10 yards long, hit a rock, and was gone forever.
#18 is a tasty little hole. From the tee box it looks incredibly narrow, and you start out thinking you want to be left of the 150 marker, and maybe even go around the back side of the fairway bunker. Once you get to the fairway you realize just how much it opens up to the right before you have to hit across the creek to the green. So the correct strategy here is to hit a strong drive right of the 150 marker (since it's a longish hole) setting up a wedge shot over the creek. Great finishing hole.
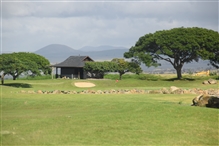
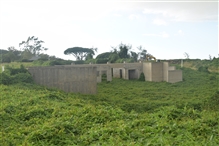
By the way, you can see the foundations that were poured for the clubhouse that was never built after you finish this hole and start the serpentine drive back to the temporary clubhouse...
This is a very nice course, and there are four sets of tees to choose from. So you can self-sort as to how much golf you want to bite off. Pay attention to the slopes, and notice they're fairly stiff. The more yardage you take on, the more difficult it gets... |